What are the benefits of the Medicine ball SIT-UP throw?
This will develop your intermuscular coordination, build up your abs and lower back muscles, and burn more calories by using more muscle mass. Fun, versatile, and with a wide variety of exercises.
The medicine ball sit-up throw is an effective exercise for targeting and strengthening your core muscles. It is a great way to improve your overall fitness level, as well as your performance in a variety of sports. This exercise can also be used to increase your cardiovascular endurance and help you to lose weight. The medicine ball sit-up throw is a compound movement that works for multiple muscle groups at the same time. This exercise requires you to lie on your back, with your knees bent and feet on the ground. You then hold a medicine ball in both hands and extend your arms straight up above your head. From this position, you quickly throw the medicine ball up in the air and then catch it while simultaneously sitting up.
The benefits of the medicine ball sit-up throw are numerous. Firstly, it is a great way to improve core strength. You are able to target your abdominal muscles, obliques, and lower back muscles. This is important for stabilizing your spine and improving posture. Secondly, this exercise increases your cardiovascular endurance. By throwing and catching the medicine ball, you are using multiple muscle groups and pushing your cardiovascular system. This can help to burn calories and lead to weight loss.
Lastly, the medicine ball sit-up throw is a great way to improve your performance in various sports. By strengthening your core muscles, you will be able to move more explosively and with greater power. This can help you to become a better player in sports such as basketball, volleyball, and football.
So if you are looking for an effective exercise to target and strengthen your core muscles, then consider adding the medicine ball sit-up throw to your workout routine. Not only will it increase your core strength, cardiovascular endurance, and performance in a variety of sports, but it can also help you to achieve your weight loss goals.
How to do Medicine Ball Sit-Up And Overhead Throw?
Setup Rest on the floor facing a wall with legs bent. Hold the medicine ball on both sides.
Exercise Lie back with a ball overhead and tap the ball to the floor. Immediately throw the ball to the wall from overhead while sitting up. The ball rebounds off of the wall. Catch the ball slightly above and in front of the head. Continue to volleyball against the wall.
Benefits of Ardha Purvottanasana / Reverse Tabletop Pose
Reduces stress, anxiety, and depression.
Stretches & strengthens the lower body muscles, back, chest, and neck.
Stimulates the lungs and abdominal organs. Reduces thyroid problems.
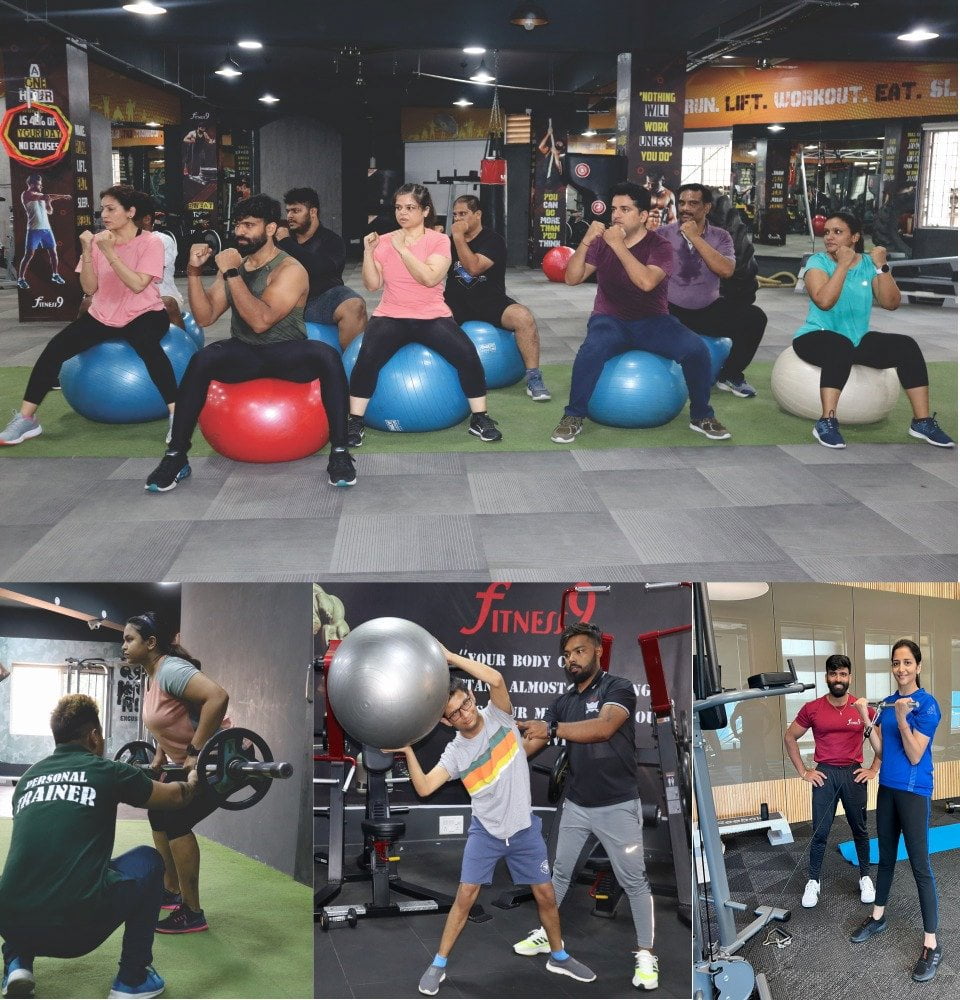
Fitness 9 is a Gym, Health and fitness center near Secunderabad, Bowenpally area in Hyderabad. We offer Personal fitness training and exercise. Our goal is to improve health and wellness for all our members near Gunrock and Diamond point area. With certified trainers, we concentrate on critical problems and help to solve them in a holistic manner. We have certified Gym trainers with 15 years’ experience for the best results.
Downward Dog Chaturanga Upward Dog – Exercise Benefits Fitness At-home Workouts Online
Downward Dog (or) Adho Mukha Shvanasana
Strengthens your arms, and legs and stretches your spine, hips, hamstrings, and calves.
It also tones your arms and abdominals. Chaturanga strengthens and tones the wrists, arms, abdominal muscles, and lower back. It also strengthens the muscles surrounding the spine, which helps to improve posture.
Upward-Facing Dog (or) Urdhva Mukha Svanasana will challenge you to lift and open your chest. Benefits
Improves posture
Strengthens the spine, arms, wrists
Stretches lungs, shoulders, and abdomen.
Downward Dog, Chaturanga, Upward Dog: A Complete Guide to These Yoga Poses
Downward dog, chaturanga, and upward dog are three of the most basic and important yoga poses. They are often used in a sequence to warm up the body and prepare for more challenging poses.
Downward Dog
Downward dog is a pose that stretches the back, shoulders, and hamstrings. It also strengthens the arms and core. To do downward dog, start on all fours with your hands under your shoulders and your knees under your hips. Slowly straighten your legs, keeping your back flat and your heels reaching towards the ground. Hold for 5-10 breaths.
Chaturanga
Chaturanga is a push-up variation that strengthens the upper body and core. To do chaturanga, start in downward dog. Lower your body down until your chest touches the ground, keeping your elbows close to your sides and your body in a straight line from your head to your heels. Push back up to the downward dog. Repeat 8-10 times.
Upward Dog
The upward dog is a pose that stretches the spine and shoulders. It also strengthens the arms and core. To do the upward dog, start in Chaturanga. Push up from the ground, straightening your arms and lifting your hips up towards the ceiling. Point your toes and gaze towards your fingertips. Hold for 5-10 breaths.
Benefits of Downward Dog, Chaturanga, and Upward Dog
Improves flexibility. Downward dog, chaturanga, and upward dog all stretch the back, shoulders, hamstrings, and spine. This can help to improve flexibility and range of motion.
Strengthens the upper body. Chaturanga and upward dog are both push-up variations that strengthen the arms, shoulders, and core. This can help to improve posture and reduce back pain.
Improves balance. The downward dog requires good balance and coordination. Practicing a downward dog can help to improve balance and coordination throughout the body.
Reduces stress. Downward dog, chaturanga, and upward dog are all calming and relaxing poses. Practicing these poses can help to reduce stress and improve overall mental health.
At-home Workout
If you are new to yoga, you can start by practicing downward dog, chaturanga, and upward dog for 5-10 breaths each. As you get more experienced, you can increase the number of repetitions and hold each pose for longer. You can also add other poses to your workout, such as sun salutations, warrior poses, and seated twists.
To do an at-home workout, you will need a yoga mat and comfortable clothing. You can find yoga mats at most sporting goods stores or online. Comfortable clothing is important because you will be moving your body in different ways. You may want to wear loose-fitting clothing that does not restrict your movement.
To start your workout, warm up with some gentle stretches. You can do some arm circles, leg swings, and torso twists. Once you are warmed up, you can start practicing downward dog, chaturanga, and upward dog. You can also add other poses to your workout.
As you are practicing, pay attention to your breath. Breathe deeply and evenly throughout your workout. If you find yourself getting stressed or overwhelmed, take a few deep breaths and relax.
At the end of your workout, cool down with some gentle stretches. You can do some hamstring stretches, calf stretches and back stretches.
Yoga is a great way to improve your flexibility, strength, balance, and mental health. It is also a great way to reduce stress and improve overall well-being. If you are looking for a new way to get fit, yoga is a great option.
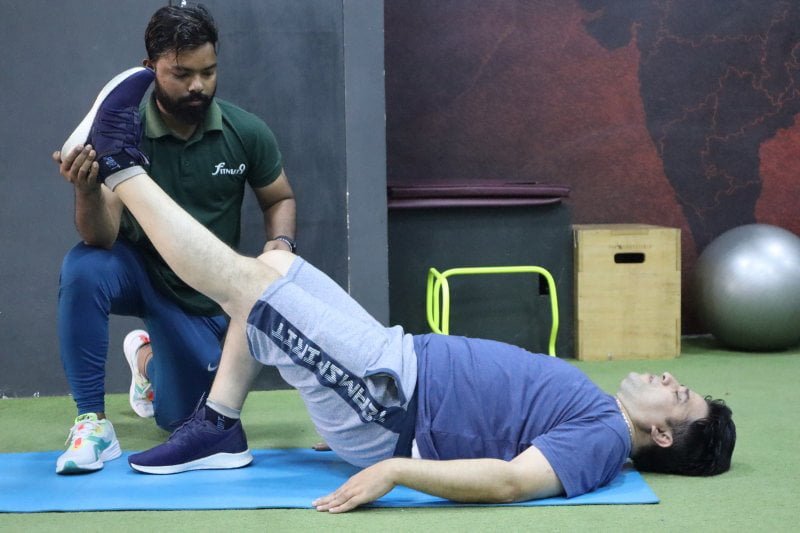
Fitness9 Gym Near Diamond Point Secunderabad – Glute Bridges Exercise for Hips and Butt
Glute Bridge is great for improving hip mobility and strengthening your lower back. It will also strengthen and build your butt, get rid of pain and help to improve overall performance.
How to Do Glute Bridges Exercise for Hips and Butt
Glute bridges are one of the best exercises to strengthen your hips and butt muscles. They can help you improve your posture, balance, mobility, and performance in various sports and activities. They can also help you prevent and relieve lower back pain, which is a common problem for many people who sit for long hours. In this blog post, we will show you how to do glute bridges exercise correctly, and introduce you to some variations that can make your workout more challenging and fun. We will also answer some frequently asked questions about glute bridges exercise.
What are glute bridges exercise?
Glute bridges exercise are a type of bodyweight exercise that involves lifting your hips off the ground while keeping your feet and shoulders on the floor. The main muscles that work during glute bridges exercise are the gluteus maximus, which is the largest and most powerful muscle in your butt, and the hamstrings, which are the muscles at the back of your thighs. Glute bridges exercise also engage your core muscles, such as the transverse abdominis, which is the deepest layer of your abdominal muscles, and the erector spinae, which are the muscles that run along your spine.
How to do glute bridges exercise correctly?
To do glute bridges exercise correctly, you need to follow these steps:
Lie on your back on a mat or a hard surface, with your knees bent and your feet flat on the floor. Your feet should be about hip-width apart, and your heels should be close enough to your butt that you can touch them with your fingertips. Your arms should be by your sides, with your palms facing up.
Brace your core muscles by drawing your belly button in toward your spine, and squeeze your glutes by tucking your tailbone under. This will help you avoid arching your lower back and protect your spine from injury.
Press your heels into the floor, and lift your hips up until your body forms a straight line from your shoulders to your knees. Do not push your hips too high or too low, as this can compromise your form and reduce the effectiveness of the exercise. Your hips should be in line with your torso, not above or below it.
Hold the top position for a second or two, and squeeze your glutes hard. Make sure you are not holding your breath, but breathing normally throughout the movement.
Lower your hips back to the floor in a controlled manner, without touching the floor or relaxing your muscles. Repeat the movement for the desired number of repetitions or time.
What are some variations of glute bridges exercise?
Glute bridges exercise are a versatile exercise that can be modified to suit different fitness levels and goals. Here are some variations of glute bridges exercise that you can try:
Single-leg glute bridge
This variation increases the difficulty of the glute bridge by making it a unilateral exercise, which means working one side of your body at a time. This challenges your balance, stability, and coordination, and also helps you identify and correct any muscle imbalances between your left and right sides.
To do the single-leg glute bridge, follow the same steps as the basic glute bridge, but lift one leg off the floor and extend it straight in front of you. Keep your thighs parallel and your hips level, and do not let your hips drop or twist. Perform the same number of repetitions or time on each leg.
Weighted glute bridge
This variation adds resistance to the glute bridge by placing a weight on your hips, such as a dumbbell, a kettlebell, a sandbag, or a barbell. This increases the intensity and the load on your glute and hamstring muscles, and helps you build more strength and power.
To do the weighted glute bridge, follow the same steps as the basic glute bridge, but place a weight on your hips, and hold it with your hands to prevent it from sliding off. Make sure the weight is not too heavy or too light, and adjust it according to your ability and comfort. You can also use a pad or a towel to cushion your hips from the weight.
Feet elevated glute bridge
This variation elevates your feet on a platform, such as a bench, a box, a chair, or a ball. This changes the angle and the range of motion of the glute bridge, and places more emphasis on your hamstrings and your lower back muscles.
To do the feet elevated glute bridge, follow the same steps as the basic glute bridge, but place your feet on a platform, and keep your legs bent at 90 degrees. Make sure the platform is stable and secure, and do not let your feet slide or roll off. You can also place a weight on your hips for more challenge.
Banded glute bridge
This variation uses a resistance band, such as a mini-band or a loop band, to create tension and resistance around your knees. This activates your gluteus medius and gluteus minimus, which are the smaller and deeper muscles in your butt, and also your hip abductors, which are the muscles that move your legs away from your body.
To do the banded glute bridge, follow the same steps as the basic glute bridge, but place a band around your knees, and keep it taut throughout the movement. As you lift your hips, push your knees out against the band, and do not let them cave in. You can also place a weight on your hips for more challenge.
FAQs
Here are some frequently asked questions about glute bridges exercise:
Q: How often should I do glute bridges exercise?
A: The frequency of doing glute bridges exercise depends on your fitness level, goals, and routine. Generally, you can do glute bridges exercise two to three times a week, as part of your lower body or full body workout. You can also do glute bridges exercise as a warm-up or a cool-down exercise, or as a recovery or activation exercise on your rest days.
Q: How many repetitions or sets should I do of glute bridges exercise?
A: The number of repetitions or sets of glute bridges exercise depends on your fitness level, goals, and variation. Generally, you can do 10 to 20 repetitions or 30 to 60 seconds of glute bridges exercise per set, and two to four sets per workout. You can also adjust the number of repetitions or sets according to the weight, the band, or the platform you use.
Q: What are some common mistakes to avoid when doing glute bridges exercise?
A: Some common mistakes to avoid when doing glute bridges exercise are:
Arching your lower back or lifting your hips too high or too low. This can cause strain and injury to your spine, and reduce the effectiveness of the exercise. To prevent this, brace your core muscles, tuck your tailbone under, and keep your hips in line with your torso.
Holding your breath or tensing your neck or shoulders. This can create unnecessary pressure and tension in your upper body, and affect your breathing and posture. To prevent this, breathe normally and relax your neck and shoulders throughout the movement.
Pushing backward or forward with your feet or lifting your heels or toes off the floor. This can cause instability and imbalance in your lower body, and shift the focus away from your glute and hamstring muscles. To prevent this, press your heels into the floor, and drive your hips straight up.
How to do the glute bridges exercise?
How to do glute bridges?
Start lying face up on the ground with arms to the side, knees bent, and heels on the ground with your toes up. Squeeze your glute and abdominal muscles then lift your hips off the ground until your knees, hips, and shoulders are in a straight line. Hold 2-3 seconds and return to starting position, repeat for the prescribed number of repetitions. You should feel this working mainly on your glutes and secondarily your hamstrings. You should not feel any pain in your lower back. Tip: Be careful to not let your back hyper-extend.
How Often Should You Train Glutes?
3-6 times /week – DB Frog thrusts 4set x 20reps – Frog Reversed weighted hypers + BW 3set x 10reps/10reps BW – DB Single leg hip thrusts 3set x 12-15reps /leg – Back extensions 4set x 15reps – Knee banded fire hydrant 3set x 20reps /side 2-3 times / week – squats 3set x 10reps – Sumo deadlift 3set x 10reps – Lunges 3set x 20 steps total – Bulgarian split squats 4set x 10reps /leg – DB RD 3set x 10reps
What are the benefits of the Glute Bridge exercise?
Glute Bridge exercise improves hip mobility and strengthens your lower back. This is an important exercise for anybody with a desk-bound job. If you do the Glute Bridge exercise correctly you will feel a burn in your glutes and your hamstrings.
Step-by-step instructions for doing glute bridges exercise.
Lie on your back with your hands at your sides, knees bent, and feet flat on the floor under your knees.
Tighten your abdominal and buttock muscles by pushing your low back into the ground before you push up.
Raise your hips to create a straight line from your knees to your shoulders.
Squeeze your core and pull your belly button back toward your spine.
Hold for 20 to 30 seconds, and then return to your starting position.
Complete at least 10 reps.
Common Mistakes while doing the glute bridges exercise
Avoid raising your hips too high. Hyperextending your lower back can lead to strain. Keeping your abdominals engaged will ensure you don’t arch your back excessively.
If you find your hips are dropping as you try to hold the bridge position, lower your pelvis back down to the floor. When you’re first starting out, you may need to hold the bridge position for only a few seconds at a time until you build up strength. Glute bridges are a great exercise for strengthening your glutes, hamstrings, and core. They are a compound exercise, which means that they work multiple muscle groups at the same time. Glute bridges are a low-impact exercise, which makes them a good option for people of all fitness levels. To do a glute bridge, you will need a mat or a stable surface to lie on. Start by lying on your back with your knees bent and your feet flat on the floor. Place your arms at your sides, palms down. Engage your core and glutes and raise your hips off the floor until your body forms a straight line from your shoulders to your knees. Hold this position for a second, then lower your hips back down to the floor. Repeat this movement for 10-12 repetitions. You can increase the difficulty of the exercise by adding weights to your hips or by doing single-leg glute bridges. Here are some tips for doing glute bridges safely:
Keep your core engaged throughout the entire movement.Don’t let your lower back arch.If you feel any pain, stop the exercise.
Glute bridges are an excellent exercise for strengthening your glutes, hamstrings, and core. They are low-impact exercises that can be done by people of all fitness levels. By following these tips, you can do glute bridges safely and effectively.
“Happiness & Satisfaction is going to the gym. So, going every day to the gym is one way to accomplish some goals.
Regular exercise carries many physical and mental health benefits. It boosts brainpower and sharpens our memory, one can improve self-confidence.
Your mind gets filled with positive thoughts and a positive process of reflection.
“Be active, Be fit, Be healthy, Be happy”
Looking for a gym that will help you reach your fitness goals? Look no further than Fitness9 Gym in Diamond Point! We offer a wide variety of equipment and amenities, as well as personal training and group fitness classes. Whether you’re a beginner or a seasoned pro, we have something for everyone.
At Fitness9 Gym, we believe that everyone should have access to quality fitness. That’s why we offer affordable membership options and flexible hours. We also have a wide variety of equipment and amenities, so you can find the perfect workout for your needs.
In addition to our state-of-the-art facilities, we also offer personal training and group fitness classes. Our personal trainers are experts in helping people reach their fitness goals. They can help you create a personalized workout plan, provide motivation, and correct any form or technique errors.
Our group fitness classes are a great way to meet new people, learn new exercises, and get motivated to work out. We offer a variety of classes, including yoga, Pilates, Zumba, and spin.
If you’re looking for a gym that will help you reach your fitness goals, look no further than Fitness9 Gym in Diamond Point! We offer a wide variety of equipment and amenities, as well as personal training and group fitness classes. Whether you’re a beginner or a seasoned pro, we have something for everyone.
There are many benefits to working out at Fitness9 Gym. Here are a few:
Improved physical fitness: Working out can help you lose weight, build muscle, and improve your cardiovascular health.
Reduced stress: Exercise can help reduce stress and anxiety.
Increased energy levels: Working out can help you feel more energetic throughout the day.
Improved mood: Exercise can help improve your mood and reduce symptoms of depression.
Better sleep: Exercise can help you sleep better at night.
Increased self-confidence: Working out can help you feel more confident and positive about yourself.
Fitness9 Gym offers a variety of different classes, including:
Zumba: Zumba is a fun and energetic dance class that is great for all fitness levels.
Yoga: Yoga is a great way to improve your flexibility, strength, and balance.
Pilates: Pilates is a low-impact workout that is great for your core.
Barre: Barre is a workout that combines elements of ballet, Pilates, and yoga.
Strength training: Strength training is a great way to build muscle and improve your overall fitness.
Cardio: Cardio is a great way to improve your cardiovascular health and burn calories.
Fitness9 Gym is open Monday through Friday from 6am to 10pm, Saturday from 8am to 8pm, and Sunday from 10am to 6pm.
The cost of membership at Fitness9 Gym varies depending on the type of membership you choose. Monthly memberships start at ₹1,500 per month, and annual memberships start at ₹15,000 per year.
Visit our website today to learn more about our membership options and to schedule a tour of our gym. We can’t wait to help you reach your fitness goals!
What equipment does Fitness9 Gym actually have? Here’s the full, honest tour — every zone across both branches (Karkhana, Secunderabad and Kompally, Hyderabad), with the video above if you’d rather see it than read it. Short version: commercial-grade machines from Cybex, Precor, Eagle and SL-Series, complete free-weight floors, dedicated cardio and functional zones, and recovery facilities — all maintained daily, because a machine that’s out of order is a workout you didn’t get.
The Strength Floor
Free weights — full dumbbell runs from the lightest pairs to heavy metal, barbells, benches, racks and platforms. The Karkhana branch is famous for this floor; serious lifters have called it home since 2010.
Plate-loaded and pin-loaded machines — chest, back, shoulders, arms and a full lower-body line including leg press, hack squat, hip and glute machines and seated calf raises. Machine variety matters most when you’re isolating a weak point or training around an injury.
Squat racks and platforms — for the lifts that build everything else.
The Cardio Zone
Treadmill rows — commercial treadmills with entertainment screens, so steady-state days pass faster.
Indoor cycling studio — rows of spin bikes for group rides and solo sessions.
Ellipticals, step climbers, air bikes and ski-ergs — low-impact options for every knee, and brutal conditioning tools when you want them to be.
The Functional Zone
Functional rig — pull-up stations, attachments and open floor for circuits.
Sled push track, battle ropes, plyo boxes — conditioning that no machine replicates.
Kettlebells, medicine balls and slam balls — full colour-coded racks at both branches.
Measurement & Recovery
Body composition analysis (BCA) machine — your progress measured in muscle and fat, not just bathroom-scale weight. Every program starts and checks in with a BCA report.
Steam room and massage/recovery zone (Kompally) — because recovery is training too.
Showers, lockers and changing rooms at both branches — clean, every day.
Beyond Equipment
Machines don’t transform people — programs and coaches do. Everything above serves our programs: weight loss and the 15 kg challenge, strength training, personal training, health recovery for backs and knees, Zumba and CrossFit. And Kompally adds what no equipment list can: a café for the post-workout coffee and a rooftop pickleball court with a skyline view.
Want to see it all in photos? Browse the full gallery — or better, walk the floor yourself. Book a free trial: call or WhatsApp 90002 92442 (Kompally) or 81795 95959 (Karkhana).
Lean Muscle Gain, Strength Building, Joint Stability, Preventative Health, General Fitness, Tightening, Reducing Body Fat, Functionality, Quality of Life, Metabolic Boost. Body Sculpt along with
[sc_fs_multi_faq headline-0=”h2″ question-0=”What Is Body Sculpting?” answer-0=”Body sculpting is a non-aerobic, muscle-toning class, mostly focused on core strength. Most sculpting classes use weight bars, exercise bands, or dumbbells, or a combination of these gadgets. You perform traditional weight-training moves in a Body sculpt class.” image-0=”” headline-1=”h2″ question-1=”Benefits of Body Sculpting With Fitness9″ answer-1=”• Body Sculpting gives you strength and muscle tone and lowers your risk of bone loss, but only if you lift enough weights. • A certified trainer with Fitness9 makes sure the class in exhaustive. Be prepared for a difficult strength training for your body. • Women and Men can do body sculpt training. Although it may take a few sessions to learn proper form. Anyone who wants to firm up their body. Body sculpting and core strengthening are great if you want to learn the fundamentals for gym. • First timers should prepare themselves for muscle soreness the day or two after your workout. If you want to focus on a particular part of your body, look for a specialty class like Express Abs or Lower-Body Sculpting and inform our trainers accordingly. • Body Sculpt is really useful in burning the fat from your body and improving metabolism. ” image-1=”” headline-2=”h2″ question-2=”How many calories does a Body Sculpt workout burn?” answer-2=”Depending on the amount of weights you use (5-pound dumbbells are recommended), and the amount of resting time between sets, an average Body Sculpt workout can burn approximately 200-350 calories per hour. The more weight you use, and the faster you move between the sets, the more caloric burning effect you’ll get.” image-2=”” headline-3=”h2″ question-3=”When Can I see the results with Fitness9 Body Sculpt Program?” answer-3=”In about 4 weeks most people see the result. Shorter people respond to weight training faster because their muscle bellies are shorter.” image-3=”” headline-4=”h2″ question-4=”What should I wear for Body Sculpt Program in our Gym?” answer-4=”Wear whatever you feel comfortable exercising in: sweats, yoga pants, shorts, leggings, T-shirts & tank tops. Please wear athletic shoes(cross-training, running, walking, etc. are all acceptable): avoid street shoes to prevent injuries.” image-4=”” headline-5=”h2″ question-5=”Are the instructors at Fitness9 certified?” answer-5=”All instructors at Fitness9 near Gunrock are certified Body Sculpting instructors. We run a challenge program for 12 weeks.” image-5=”” headline-6=”h2″ question-6=”What is the cost price of Body Sculpt classes in Fitness9?” answer-6=”A typical annual membership costs Rs 25000. However we are giving it at an offer price of Rs 12500 and a month free training. Now you have no reason to refuse.” image-6=”” count=”7″ html=”true” css_class=””]
“Why do I hold the bar with one hand facing you, the other facing away?” I have got many messages asking this question. So here’s the answer. It is called “mixed grip”. The mixed grip stops the bar from rolling out from your hands. It improves your grip for Deadlifts by cancelling the rotation of the bar. The mixed grip is safe if you Deadlift with proper form. AND THE MIXED GRIP ISN’T CHEATING. The mixed grip is better than normal grip when you are lifting heavy weights. Why?? Because… With the normal grip you have eight fingers on one side of the but only two thumbs on the other side. When your thumbs fail to keep your hands closed, the bar rolls to you. This opens your hands and causes you to lose the bar. With the mixed grip you grab the bar like a baseball bat: one hand facing up, the other down. The bar can no longer rotate in your hands. This increases your grip strength for Deadlifts. With the normal grip, the bar always rolls down because both hands face you. #StayFitWithFitness9
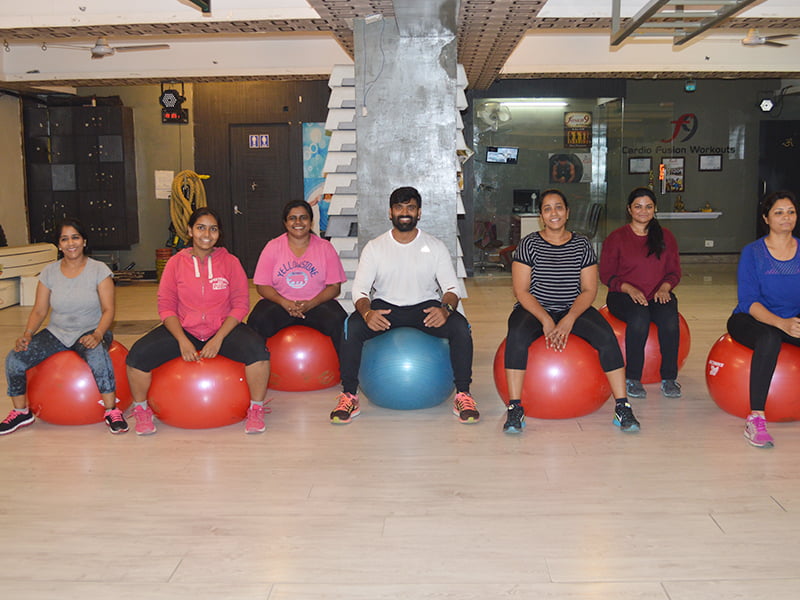
The Fitness9 Group Workout Studio runs on a simple idea: variety keeps you consistent, and consistency gets results. Our signature cardio fusion format gives you 6 days, 6 different workouts — so the body never fully adapts and the mind never gets bored. Studios run at both branches (Kompally and Karkhana, Secunderabad), and your first class is a free trial: call or WhatsApp 90002 92442.
Cardio Fusion: 6 Days, 6 Variations
Each day of the week brings a different session in the studio:
Functional training — circuits built on real movement: squats, pushes, pulls, carries.
Power yoga — strength, flexibility and breath work in one demanding hour.
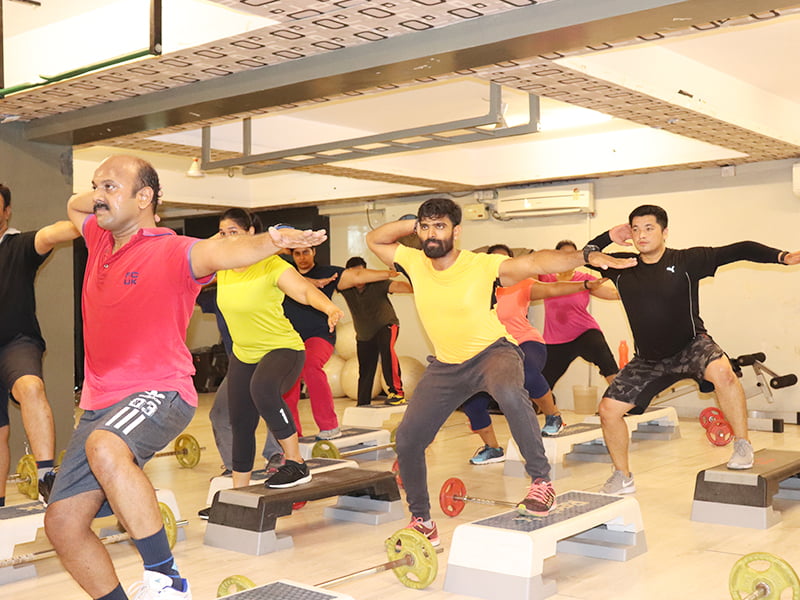
Step aerobics — classic, sweat-heavy cardio with rhythm.
Weight training — barbell and dumbbell work in a coached group format, so you learn form while you burn.
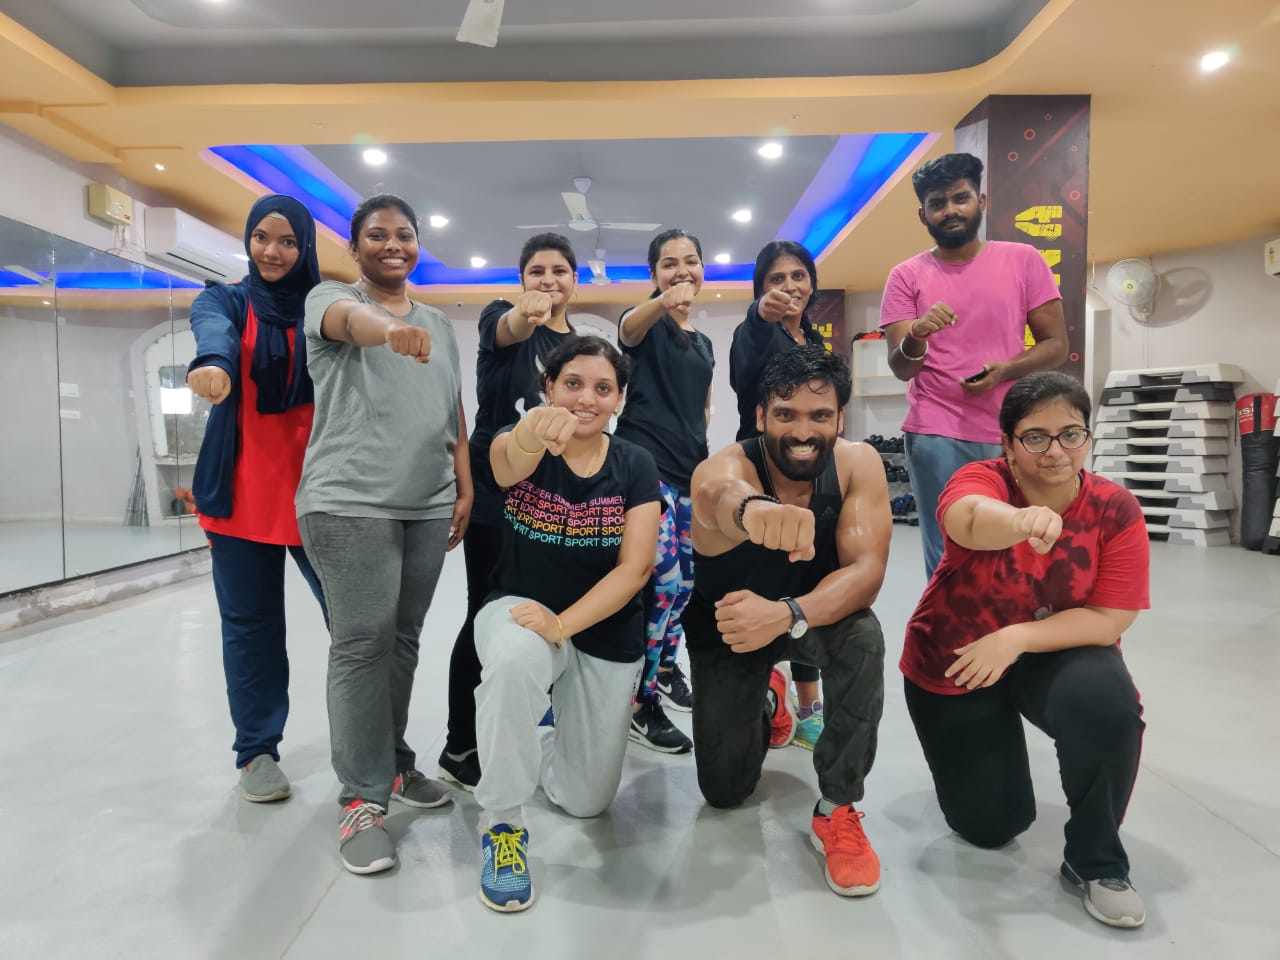
Cardio kickboxing — punches, kicks and pad drills; the best stress-relief hour on the schedule.
Rotating formats means every energy system gets trained — strength, stamina, mobility, coordination — without you having to program anything. Just show up; the variety is the plan.
Why Group Training Works
Accountability — the class is scheduled and the group notices when you’re missing. Attendance beats motivation.
Effort — everyone pushes harder in a room full of people doing the same work. It’s not competition, it’s current.
Coaching included — every session is instructor-led with form corrections, scaling options for beginners and progressions for regulars.
Community — the same faces every week become training partners, and training partners become the reason you don’t quit in month two.
Who It’s For
Everyone from complete beginners (every format scales down) to gym regulars who want conditioning their solo training misses. We also offer kids dance-fitness sessions and corporate group packages for teams — ask at your branch. Members typically combine studio classes with floor training from our main programs — classes for the engine, weights for the frame.
Find Your Class
Schedules rotate through the week and vary by branch, so call or WhatsApp for the current timetable: 90002 92442 (Kompally) or 81795 95959 (Karkhana). First class free — come see why the studio is the loudest room in the gym.